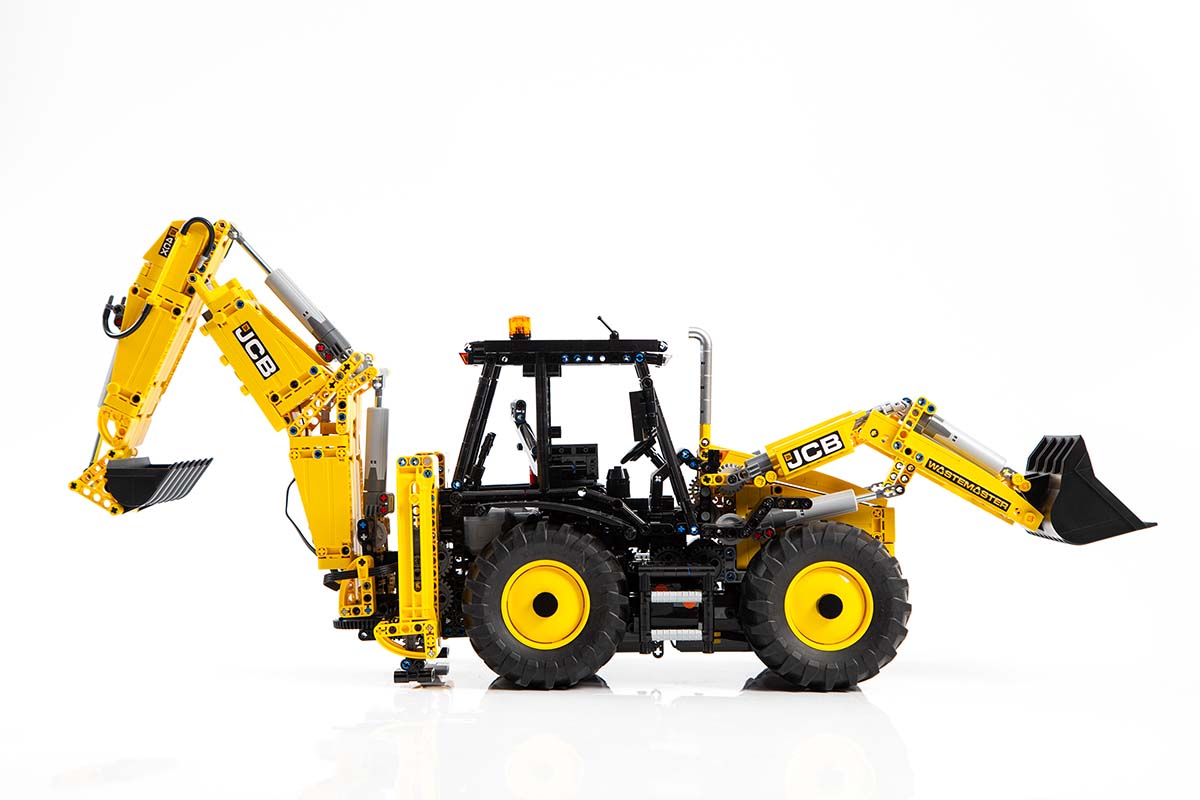
JCB BAckhoe
This MOC is my take on a JCB backhoe. It is a very complex model that features nine motorised functions, all of which are controlled by the S-Brick and its accompanying smart phone app. The model contains 2060 pieces and is a complex, but enjoyable build. PDF instructions are available to purchase here on the site, as are sticker sets. In addition to the Lego parts, this model requires two S-bricks.
Background
My aim in building this model was to create the Lego Technic set that I’d always wanted, but which had never been invented. I was aware that other talented MOC builders such as Jurgen and Sariel had built extremely impressive versions of backhoe excavators, but neither was quite what I had in mind. After watching videos of their models, I decided to attempt to build a motorised model using linear actuators (as Jurgen had done), but with a design aesthetic that was closer to the work of Erik Trax, a designer whose work I admired very much: Erik’s agricultural models are incredibly detailed and often appear so realistic that they don’t even look like Lego. This became my goal: a fully functional model, with a high degree of realism. I had no idea if it would be possible to achieve this, and in all honesty, I didn’t anticipate having much success, given that I’d never designed my own model before.
NOTE: As I designed and built this model I took many photographs, which can be seen in an album on my Facebook page. As you’ll see, there was a lot of experimentation along the way, and the model certainly didn’t always look as good as it did by the end!
Designing & Building
I began working on this model in July 2019 and worked on it intermittently for about two months. During that time, I managed to create an ugly, basic model that could drive and steer and which had a reasonable front loader. I had also designed a functional – but very unsightly – version of the rear digging arm, but I had no idea at this stage how I would integrate it into the rest of the model. To be honest, the whole thing looked pretty terrible at this stage, which was quite uninspiring! As I got busier at work, and hit more and more brick walls with the design process, I eventually decided to put the whole project away for a while. I figured that maybe I’d come back to it at some point in the future

An early, basic version of the model. At this point I was using the larger bucket from the Volvo Wheeled Loader set.
In March 2020 the Coronavirus pandemic kicked in and I suddenly found myself with a lot more time on my hands – a perfect opportunity to revisit my model. I realised that what I had was a decent enough starting point, but that I needed to start again, whilst retaining an understanding of what I’d already created. I therefore decided to learn how to use one of the many Lego design programs to help me document my existing model, so that I could dismantle it with the confidence that I could rebuild it if necessary. I quickly learnt to use Bricksmith, which enabled me to do just this: it proved to be enormously helpful, enabling me to refine and perfect what I had built already. Within a few weeks I had redesigned my initial model considerably, and progress was being made. However, Bricksmith had begun to show its limitations and some quick research revealed that most other designers were using Stud.io, which I switched to at this point. Fortunately, it was quite simple to learn to use.

An early recreation of my initial model in Bricksmith.
By May 2020 I had built an improved second version of the model that could drive, steer and which had a basic gearbox that would allow switching from front functions to rear functions, cutting down on the number of motors that I initially thought I would need to use. This concept was inspired by Jurgen’s excellent model, which used the same principle. At this point I turned my attention to the outriggers. Most other designers had used linear actuators for these, but I felt that there might be a way to achieve the same function but with rack gears. After doing some research on Bricklink, I discovered some new rack gear pieces I had not seen before (components 18940 And 18942 ). I bought these pieces, and immediately began figuring out how I could use them to create outriggers. After much trial and error, I came up with a design which seemed to work, although integrating it into the model took a lot of experimentation.

Designing the outriggers using the gear rack components
One of the biggest headaches during the entire process was figuring out a way to conceal the battery box in the front of the model. It was quite a long way into the design process before I hit upon the idea of using the relatively new 11×5 sloped pieces as side panels. Doing so meant moving from a five stud width chassis up to six studs, something that proved very challenging. The answer to this problem was to be found in Sariel’s excellent book, The Unofficial Lego Technic Builder’s Guide, which offered several solutions to this very problem. Once I had the front engine cover section designed, the model was really starting to take shape.
The final part of the build was the rear digging arm. Although I had built a functioning arm, it was an ugly, lashed-together mess that was far too heavy for the linear actuator at the rear to lift. I decided to start again, with the intention of building something that completely concealed all the internal motors. Again, I hit upon the idea of using the 11×5 sloped panels for this and once I’d gotten hold of some, I surprised myself by building a much-improved digging arm in less than a day. The finished arm was significantly simpler than my previous version and was much more in keeping with the existing aesthetic of the model

Designing the rear digging arm using the 11×5 panels
Over the next few months, I made incremental improvements to the model, which included creating a more realistic cab interior, and designing and printing stickers. I also spent a lot of time working on the design of the controller for the S-bricks.
The model was completed on July 19th 2020. I then spent several months refining the digital version in Stud.io and perfecting the instructions.

My controller for the model in the S-Brick app
Conclusion
I’m incredibly proud of this model and in all honesty, I still can’t believe I was successful in completing this project. In the year since I finished it, I’ve become aware of some of its limitations: it’s not possible to steer the model with the front loader lowered for example, although this is really a consequence of the tyres being considerably wider than they would be on the actual machine. The drive train for the front bucket is a little slower than I’d like, and I suspect that a better design for the front mudguards might be possible. Perhaps at some point in the future there will be an updated version.
JCB BACKHOE Gallery #1


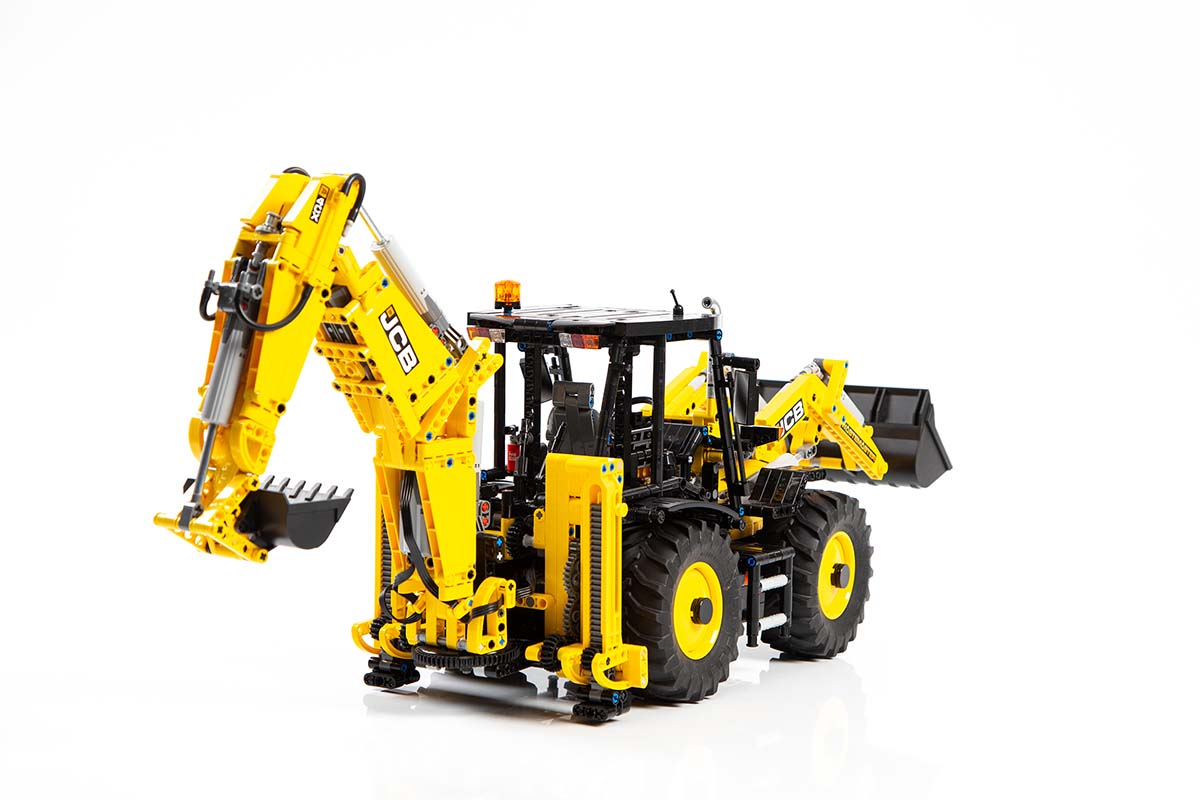
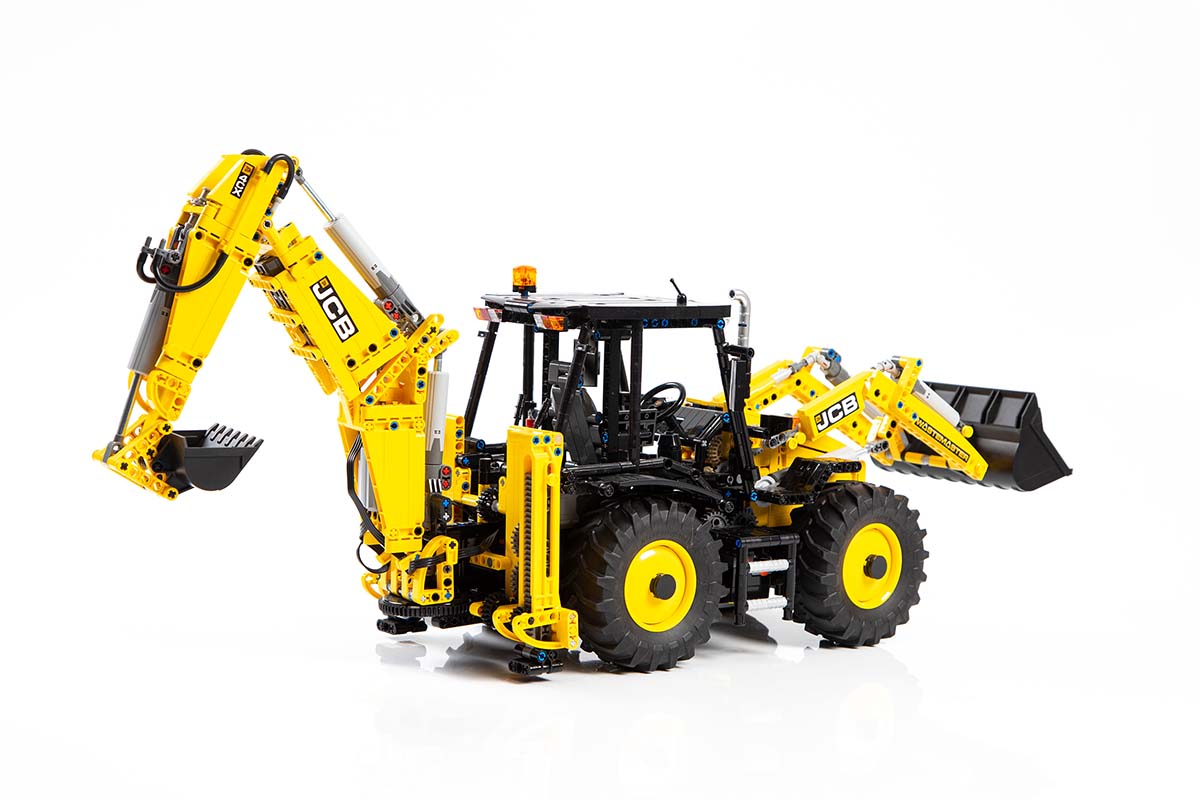
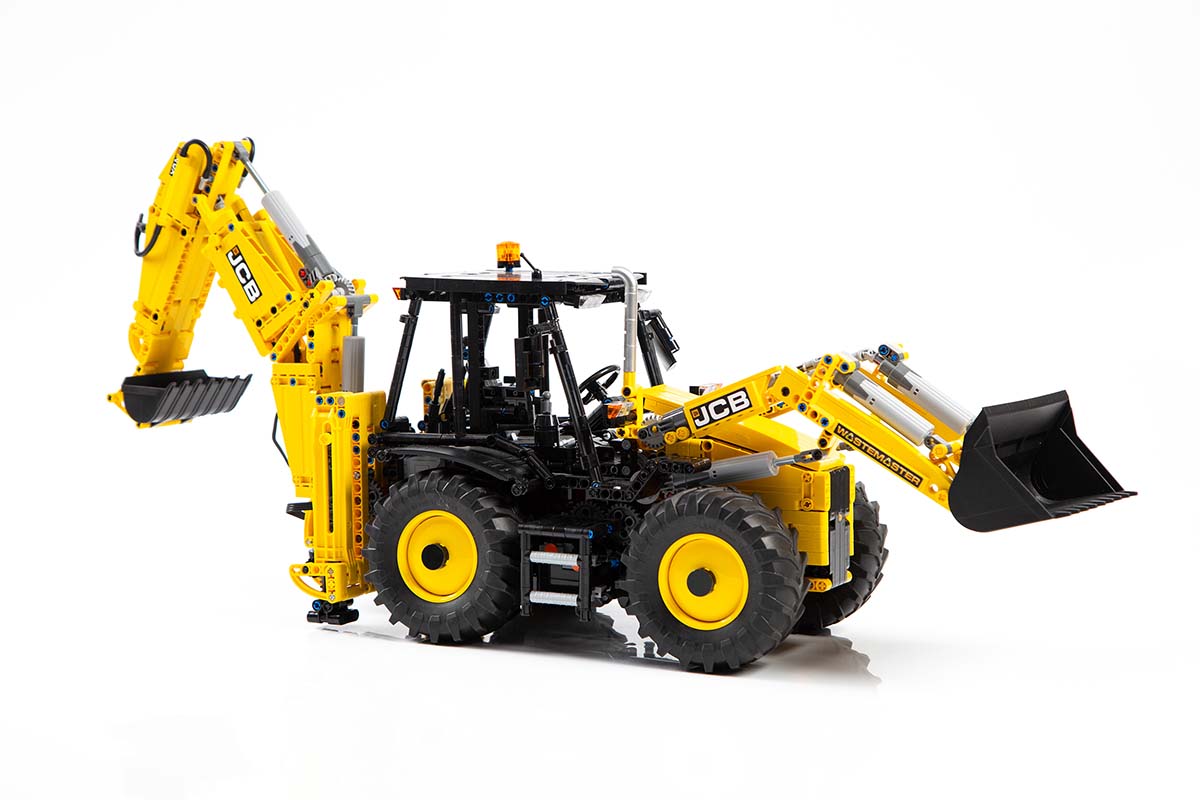
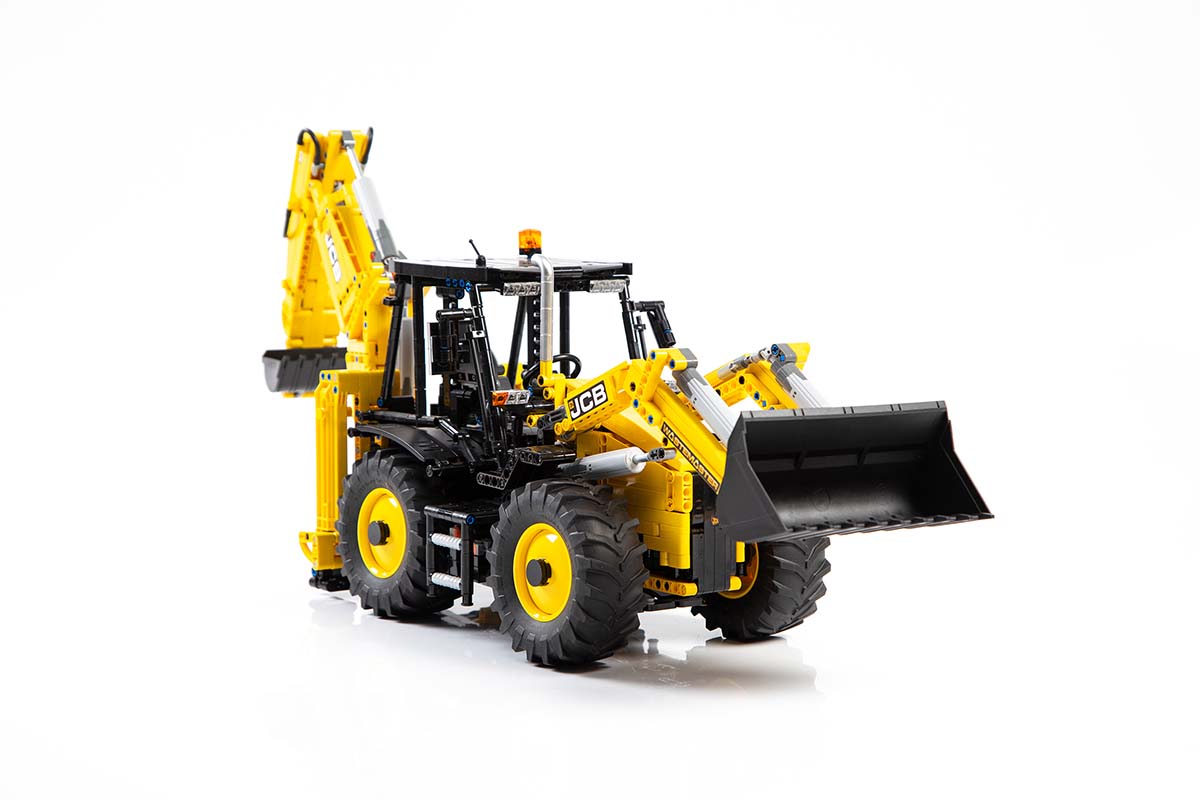


JCB BACKHOe Gallery #2


